最近因为工作需要在学习Node.js,简单的搭建了一个nodejs+express+ejs示例,记录一下。
环境和知识准备:
环境搭建
Node.js的安装省略,网上有很多教程。
参考文档:
Node.js 教程 | 菜鸟教程 http://www.runoob.com/nodejs/nodejs-tutorial.html
Express - 基于 Node.js 平台的 web 应用开发框架 http://www.expressjs.com.cn/
EJS – Embedded JavaScript templates http://ejs.co/
本文参考 Use EJS to Template Your Node Application | Scotch https://scotch.io/tutorials/use-ejs-to-template-your-node-application 这篇文章搭建的示例,IDE使用的是Visual Studio Code https://code.visualstudio.com/。
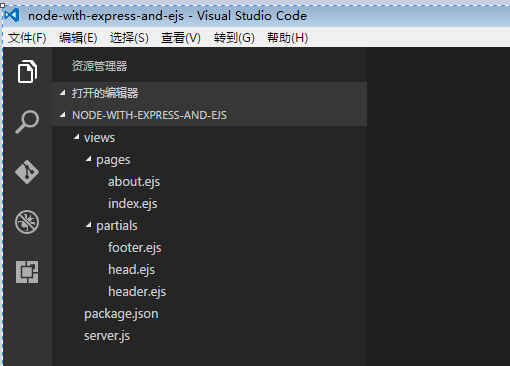
文件结构
在磁盘上创建文件夹node-with-express-and-ejs,在该文件夹下面创建以下文件夹和文件,完成后的文件结构如下:
安装
打开package.json这个项目配置文件,添加对express和ejs的依赖
1 | { |
接下来使用npm install命令进行安装:
1 | $ npm install |

编辑server.js文件,增加如下代码:1
2
3
4
5
6
7
8
9
10
11
12
13
14
15
16
17
18
19
20
21
22// server.js
// load the things we need
var express = require('express');
var app = express();
// set the view engine to ejs
app.set('view engine', 'ejs');
// use res.render to load up an ejs view file
// index page
app.get('/', function(req, res) {
res.render('pages/index');
});
// about page
app.get('/about', function(req, res) {
res.render('pages/about');
});
app.listen(3000);
console.log('3000 is the magic port');
启动
使用 $ node server.js 命令启动服务1
$ node server.js
启动成功后,我们就可以在浏览器中访问:http://127.0.0.1:3000/ 和 http://127.0.0.1:3000/about 了。
利用EJS Partials编写公用的模板文件
views/partials/head.ejs1
2
3
4
5
6
7
8
9
10<!-- views/partials/head.ejs -->
<meta charset="UTF-8">
<title>Super Awesome</title>
<!-- CSS (load bootstrap from a CDN) -->
<link rel="stylesheet" href="//maxcdn.bootstrapcdn.com/bootstrap/3.2.0/css/bootstrap.min.css">
<style>
body { padding-top:50px; }
</style>
views/partials/header.ejs1
2
3
4
5
6
7
8
9
10
11
12
13
14
15
16
17
18
19<!-- views/partials/header.ejs -->
<nav class="navbar navbar-default" role="navigation">
<div class="container-fluid">
<div class="navbar-header">
<a class="navbar-brand" href="#">
<span class="glyphicon glyphicon glyphicon-tree-deciduous"></span>
EJS Is Fun
</a>
</div>
<ul class="nav navbar-nav">
<li><a href="/">Home</a></li>
<li><a href="/about">About</a></li>
</ul>
</div>
</nav>
views/partials/footer.ejs1
2
3<!-- views/partials/footer.ejs -->
<p class="text-center text-muted">© Copyright 2014 The Awesome People</p>
使用include标签引入公用的模板
1 | <!-- views/pages/index.ejs --> |
修改完成后,再次访问首页,页面如下所示: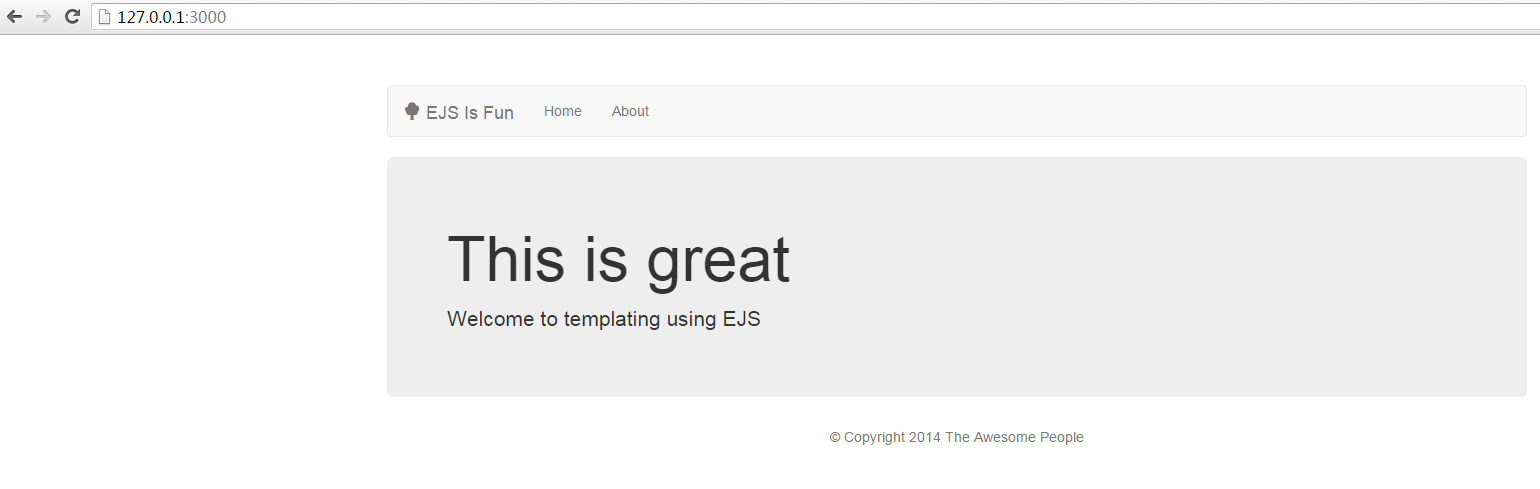
修改about页面1
2
3
4
5
6
7
8
9
10
11
12
13
14
15
16
17
18
19
20
21
22
23
24
25
26
27
28
29
30
31
32
33
34
35
36
37
38
39<!-- views/pages/about.ejs -->
<html lang="en">
<head>
<% include ../partials/head %>
</head>
<body class="container">
<header>
<% include ../partials/header %>
</header>
<main>
<div class="row">
<div class="col-sm-8">
<div class="jumbotron">
<h1>This is great</h1>
<p>Welcome to templating using EJS</p>
</div>
</div>
<div class="col-sm-4">
<div class="well">
<h3>Look I'm A Sidebar!</h3>
</div>
</div>
</div>
</main>
<footer>
<% include ../partials/footer %>
</footer>
</body>
</html>
访问about页面: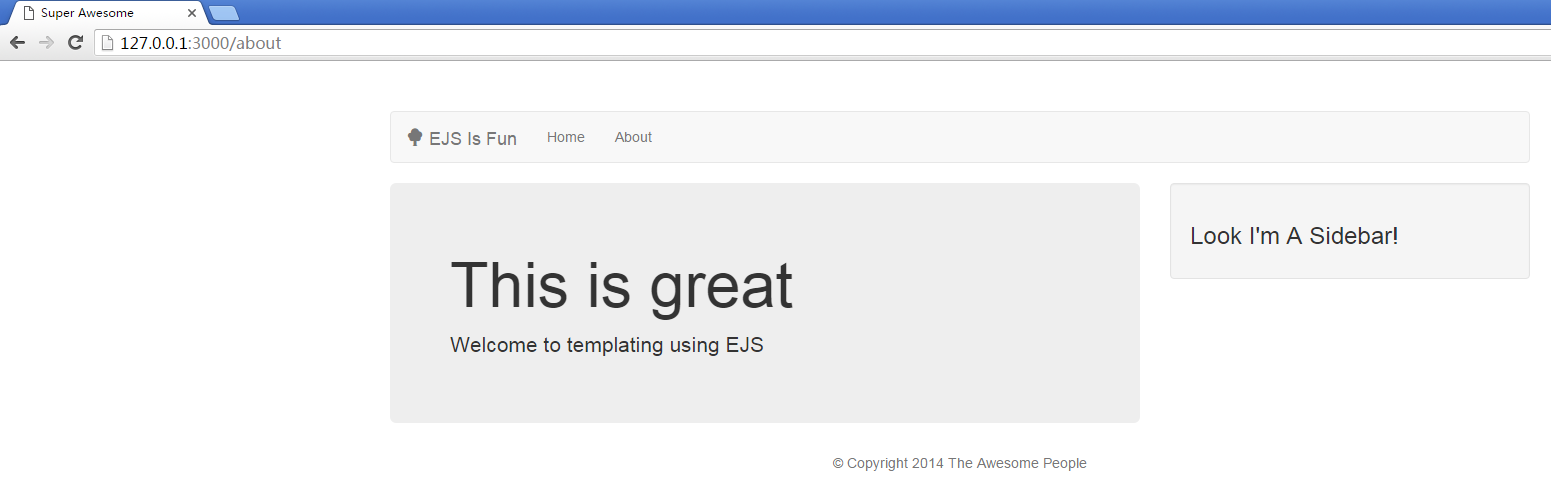
下面我们看看如何传递数据到页面(实际生产环境中我们应该从数据库中获取数据):
打开server.js,修改app.get(‘/‘)这个路由,增加一些模拟数据:1
2
3
4
5
6
7
8
9
10
11
12
13
14
15
16// server.js
// index page
app.get('/', function(req, res) {
var drinks = [
{ name: 'Bloody Mary', drunkness: 3 },
{ name: 'Martini', drunkness: 5 },
{ name: 'Scotch', drunkness: 10 }
];
var tagline = "Any code of your own that you haven't looked at for six or more months might as well have been written by someone else.";
res.render('pages/index', {
drinks: drinks,
tagline: tagline
});
});
修改index.ejs文件,利用<%=%>标签(和JSP中的标签类似)来显示变量的数据:1
2
3
4
5<!-- views/pages/index.ejs -->
...
<h2>Variable</h2>
<p><%= tagline %></p>
...
使用 .forEach来遍历数据:1
2
3
4
5
6
7
8
9<!-- views/pages/index.ejs -->
...
<h2>Loop</h2>
<ul>
<% drinks.forEach(function(drink) { %>
<li><%= drink.name %> - <%= drink.drunkness %></li>
<% }); %>
</ul>
...
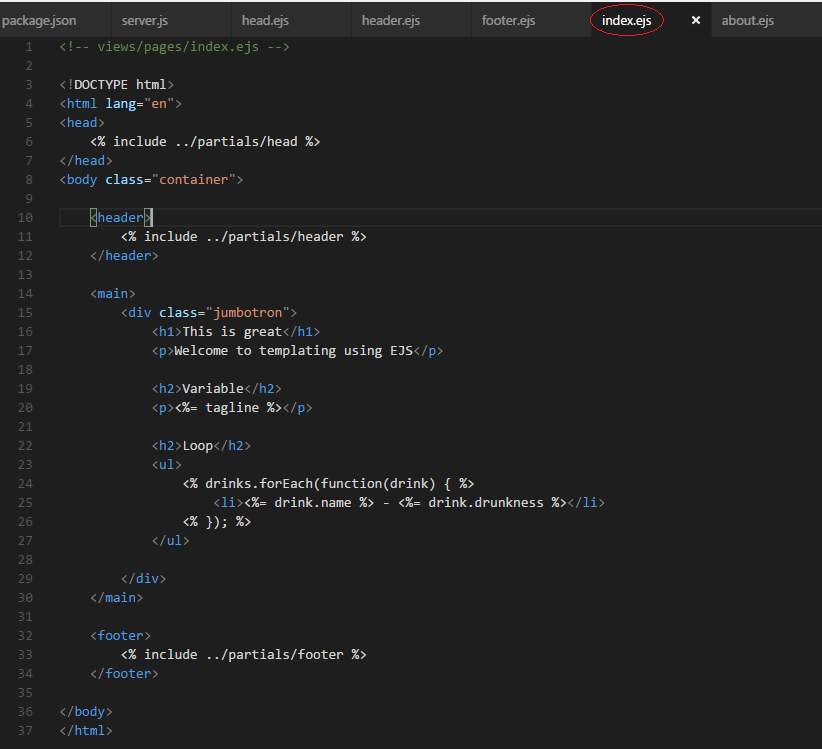
修改后的index.ejs文件如下: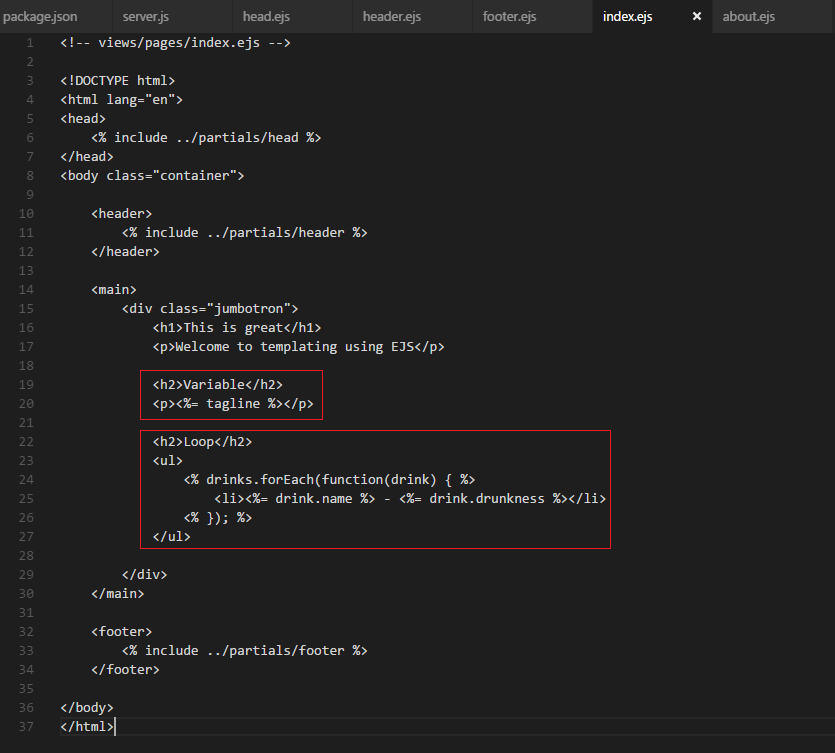
再次访问首页,可以发现数据已经传递到页面了: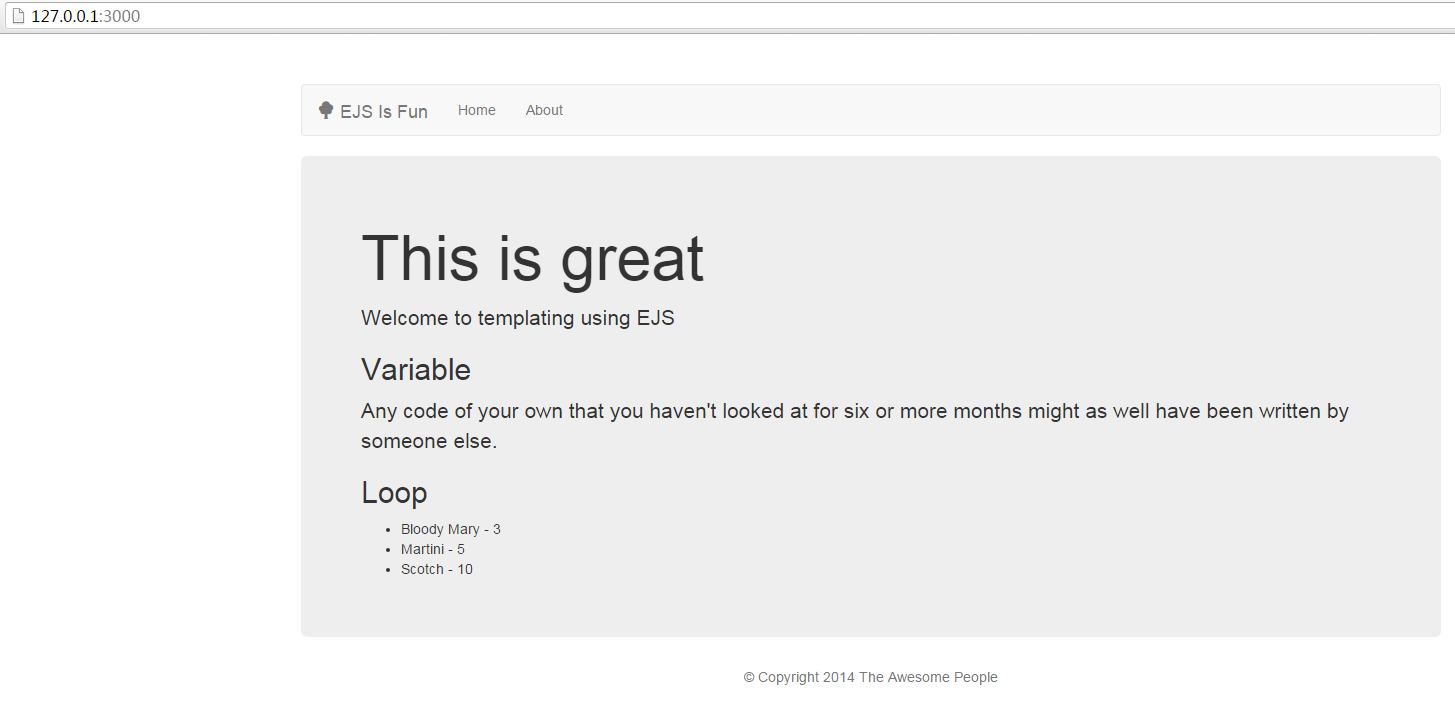
至此,一个简单的nodejs+express+ejs示例就完成了。
后记:代码编写过程中发现VSCode不支持ejs后缀的文件的语法高亮显示,解决方案如下:
参考文档:Add .EJS support or extend existing HTML to include .EJS https://github.com/Microsoft/vscode/issues/2853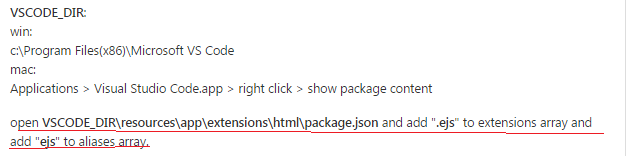
修改完成后,重启VSCode,发现index.ejs文件里面的html也可以高亮显示如,如下所示: